The podcast is finally live! Woo-hoo!
You can find all of the episodes on the blog at mebfaber.com/podcast. You can also subscribe here:
We’ll update each show with showlinks, etc. The format is threefold:
- Me chatting about a research topic, trading idea, or recent speech. Often they don’t record them so I’ll rehash some of the topics.
- Interviewing a guest, but less of an interrogation and more of a fireside chat that is interactive.
- Radio style Q&A from readers…so as you listen to some shows please send questions and comments to: feedback@theMebFaberShow.com
I imagine a lot of this will change once we get 5-10 episodes under our belt.
Some of our older readers may remember our old case studies on how to start an ETF, and how to self-publish a book. I chronicle some of the steps in the process of starting up a podcast below so it may save some readers time and effort if they choose to go down the same route.
So, here are some tips on how to start an unproven, currently unprofitable investing podcast.
Now, to avoid potential confusion and the resulting emails, I don’t present the following as “the right way.” Rather, it’s more of a documentary of the steps our team has taken to date. And admittedly, ours is an abnormal set-up according to our sound engineer. I’m certain there are more traditional ways to tackle podcasting, as well as numerous acceptable equipment alternatives to what we’ve purchased. So what you’re about to read is merely the way we’ve done it – whether right or wrong.
Before we dive into the equipment details, I’ll share just one piece of philosophical advice I’ve heard from many sources: Be committed.
The veterans I’ve consulted all seem to echo the idea that podcasting is not for tire-kickers. Creating a quality show that listeners enjoy week-in-week-out requires a significant commitment of time and creative energy. So before taking any additional steps, wrestle with whether you’re willing to make a lasting commitment. Of course, therein lies the challenge – I feel committed today, but check back with me after doing twenty of these things.
But let’s assume you’re committed, what’s next? For us, it has been assembling the right recording equipment. For our two primary microphones, we purchased two Heil PR 40 mic bundles. I’ll be using one Heil; we’ll use the other for either an in-office guest, or possibly a co-host.
The “bundle” part of that purchase includes a shock mount for the Heil, a two-section mic stand, and an XLR cable. We augmented each bundle with a Heil windscreen (similar to a pop filter, these reduce unwanted “popping” noises in your recording caused by wind, or your breath, rushing through a mic).
Side note: For those of you who don’t know, you can choose a mic that uses a USB cable, which will plug directly into your computer. You can’t do that with a mic that requires an XLR cable (what we purchased). When you go the XLR route, you’ll need something called an audio interface, or in our case, a portable digital record; but we’ll get to shortly. Apparently there’s some disagreement as to which recording method produces the best sound quality—XLR or USB. We opted for XLR so we’ll see how it goes.
We purchased a third mic too, which actually is a USB mic. It’s an MXL AC-404 Boundary mic. But whereas the Heil mics are for a co-host/guest and me, this boundary mic is different. This is to help remote guests hear us.
You see, chances are many guests I’ll interview won’t be able to make it to our offices. In such cases, we’ll be recording the podcast as a phone call (specifically, as a Skype call. More on that shortly). So this third boundary mic, which plugs directly into our computer, will enable a remote guest to hear me (the mic picks up my voice, carries it into the computer, where Skype relays it to the guest).
By the way, in case your computer doesn’t have speakers, you’ll need to purchase some in order to hear your guest talking back to you. Nothing fancy needed. Just whatever does the job.
So at this point, we have our mics taken care of: two Heils and a MXL. But only the MXL mic plugs directly into our computer. Since the Heils connect to XLR cables, we need something called an audio interface to connect our Heil mics to our PC. (Mac lovers, please keep your torch/pitchfork ransacking visits to our office to a minimum.)
For our portable digital recorder, we chose the Tascam DR-40 recorder. We plug our Heils directly into the Tascam, then record the show. Afterward, we unplug the Heils, then connect the Tascam to our computer via a USB cable where we then upload and edit the show. More on editing in a bit.
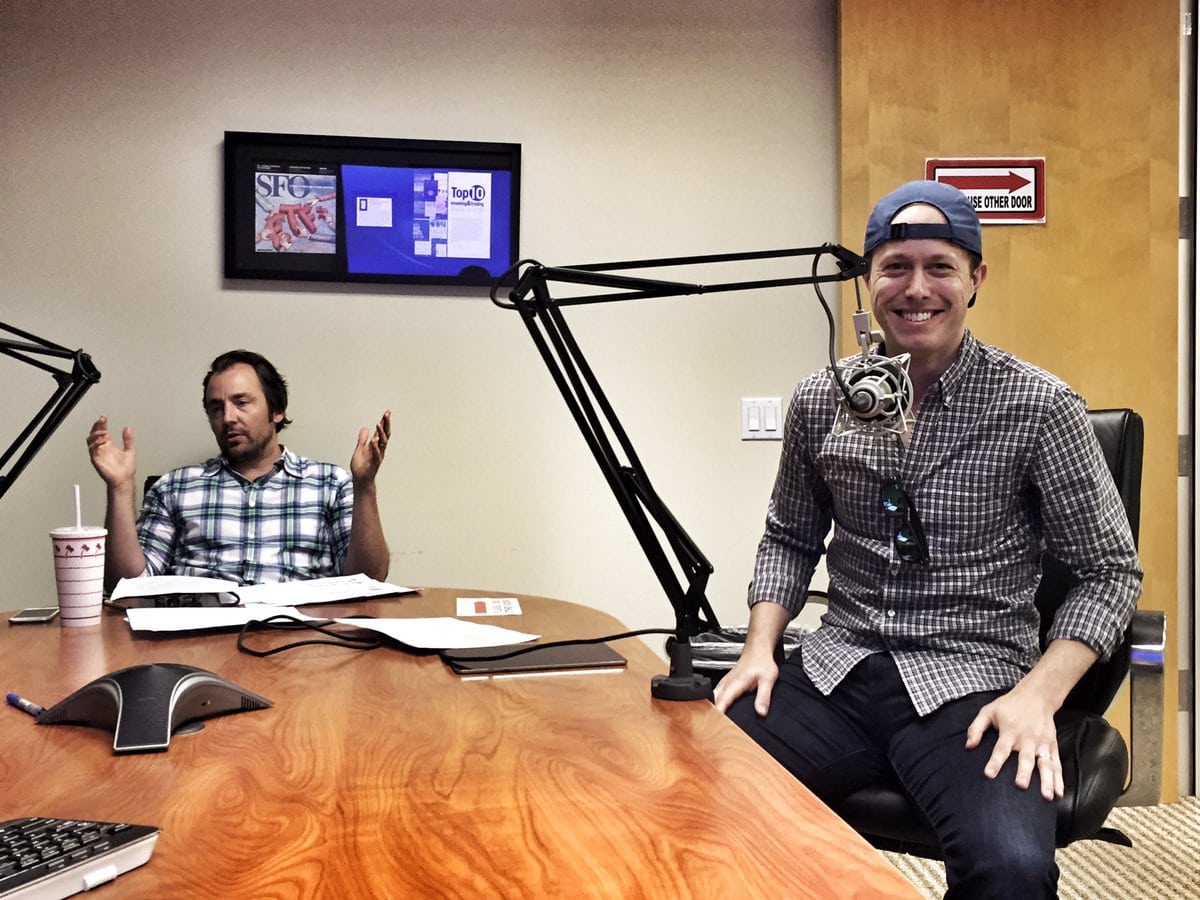
The Tascam will come with batteries, but I’m told you should avoid using them. Instead, purchase a mini USB charger to power the Tascam. Makes sense, as the last thing you’d want is batteries giving out in the middle of a recording session. You can see our setup here while recording our first podcast with Patrick after his first In N Out Burger:
At this point, we have our hardware covered but now we need something enabling us to actually record the podcast. If our guest is in-office, the Tascam does the job as previously discussed. But if we’re doing a remote interview using Skype, we’ll record the call using software called “Pamela”—specifically, “Pamela Professional Edition.”
What we’re really getting from Pamela is a clean recording of our remote guest’s voice. That’s because the Tascam will record me. This will enable us to edit two different tracks—the Pamela track and the Tascam track. This is preferential as if both my guest and I were on the same track, it would be harder to edit out, say, a coughing fit from me that obscures my guest as he reveals the one secret to making millions in the stock market.
As to editing software, here’s a place where our set-up might be different than others. We decided to hire a very talented sound engineer named Steve Flato. We found Steve as he’s been the sound engineer on Michael Covel’s podcast, which has over 4 million downloads. Steve has been a tremendous help so far. He pointed us toward much of the equipment we’ve purchased, as well as walked us through all the set-up details in idiot-proof fashion. If you’re interested in reaching out to Steve about his services, you can reach him at SteveFlato@gmail.com.
We’ll record our shows as previously detailed, but we’ll then send the two files (Tascam and Pamela) to Steve via Dropbox. He’ll then edit out the various “uhs” and “ums,” kill extended silences, adjust the EQs, balance the volume, and so on, then send us back a clean, polished file.
Though hiring a good engineer like Steve will easily pay for itself in the time it will save you, if you prefer editing yourself, I’m told that the free software Audacity is great for PC. For Mac users, “Garageband” seems to be a good option.
We now have a clean, professionally-edited audio file of our podcast. What’s next? You need to get it in the hands of your listeners.
To do that, you’ll need at least two new accounts, one with a podcast hosting service, and one with a podcast directory. We’re going with Libsyn and iTunes, respectively (in addition to iTunes, we might also set up an account with Stitcher).
So here’s the simple version of how this works: On my MebFaber.com/podcast blog is where we’ll keep a running list of the various podcast episodes. Regular blog readers can find new shows here (while people who have no idea I exist might stumble upon my shows directly from iTunes or Stitcher). But these show-URLs on my blog will sync with our Libsyn account. That’s because Libsyn is where the various podcasts will actually “live.”
Meanwhile, with the help of something called an RSS feed, Libsyn will make sure your podcast directory (iTunes or Stitcher) has your latest and greatest episode. This RSS feed makes your life more convenient, as you won’t have to upload new shows directly to iTunes or Stitcher – your RSS feed does it for you.
One quick word on opening an iTunes account… To get your podcast on iTunes, you’re going to need a summary paragraph of your show, as well as a graphic image. But iTunes is very particular about this image. It must be:
- 1400px x 1400px minimum and 3000px x 3000px maximum
- Under 500kb
- Use a rGB color space
- Be a JPG, JPEG, or PNG file
I’m told that without this, you can’t get your iTunes account up and running.
So, back to the general integration of all this… You’ll take the polished file of your recorded show… Upload it into your Libsyn account… Your RSS feed makes sure iTunes or your directory has this latest episode… Meanwhile, you’ll take the URL of this episode from Libsyn and post it on your blog, or wherever you want, so regular blog readers can find your show from your site as well as directly from iTunes… And there you have it.
There are likely countless ways to refine/improve this process. And so this post doesn’t turn into a novel, admittedly, we’ve had to gloss over details such as how to configure your various accounts. That said, these broad-brush steps should be sufficient in getting you to a working podcast.
At that point, all you need to do is create a show that people actually want to listen to week-in-week-out…year after year…keeping it fresh, insightful, with great guests…after you listen to a few of our episodes shoot me some feedback at feedback@themebfabershow.com


